A Brief (and hopefully funny) Guide to your Cleaning Commitment (Squeak 11/19)

by Julia H.

Q: Wait, what?
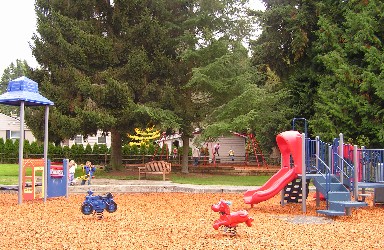
A: So here’s the thing - the school doesn’t clean itself, and if we hire a cleaning service, we have to raise tuition. And if we don’t clean, everyone in the school is going to have a semi-permanent upper respiratory infection. So, we ask that the members of the preschool help by cleaning the school. In an effort to make that process less odious, the school is divided into three different sections (roughly: upstairs, downstairs, and outside), and the amount that any given member has to clean is proportional to the amount of time their child is in school - so members of the Toddler class clean once a year, 2/3s clean twice a year, and the 3/4s and Pre-Ks clean 3 times a year.

Q: But I don’t wanna!
A: 
I can understand that. Cleaning’s not everyone’s cup of tea! (Though I would like to point out that if you do the cleaning, it means you get 1-2 hours of kid-free time, alone, following clear instructions and checking off items in a deeply satisfying way. And you can even play loud music while you clean, it’s cool!) Fortunately, there are ways to get out of cleaning if you really don’t want to. First, if you are a member of the Board as a result of the committee job you selected, you don’t have to clean. Second, you can pay $35 directly to someone on the “Paid to Clean” list, located on the bulletin board near the downstairs bathroom, and they will clean your area for you (note that if you are in a class that has to clean more than once, you would need to pay someone each time they cleaned an area on your behalf).

Q: Wait, did you say kid-free?
A: Yep. It’s actually a legal liability to the school if you bring the kids there during non-school hours, so you have a completely valid explanation for why you can’t bring them along, and why they have to stay with their other parent/another relative/a babysitter while you clean.

Q: Hmm…
A: 
I’m telling you, 90 minutes of loud, uninterrupted music of your choice. You can even listen to stuff with swear words in it!

Q: Okay, I’m in. How do I actually do the cleaning?
A: 
When it’s your turn, the cleaning coordinator will send you a note telling you which area you are assigned to clean. You’ll come after hours (usually during the weekend), and use the code you get in your cleaning reminder email to get the door key out of the lock box. When you get into the school, you’ll need to find the cleaning notebook in the mudroom (it’s near the tuition box). In the cleaning notebook, you’ll find a detailed checklist for all the things you need to do for the area you’ve been assigned. All the cleaning supplies are there at the school - generally either in the bathrooms, or in the kitchen (under the sink, or on the shelf above the stove). Make sure you initial the checklist as you go along, and get the cleaning done before Monday morning. That’s it!

Playing with Your Food

by Florence B.

We’re halfway through November and getting closer to Turkey Day! No wait, I mean Wear-Loose-Clothes-For-Eating Day! Ack, one more try -- I mean Thanksgiving Day! Thanksgiving is all about feeling thankful, but we can’t forget about the food! So, for this mid-month blog post, let’s talk about playing with our food!

But first, I have to take a quick detour to say how AWESOME the pizza restaurant in the dramatic play area is! Whether you’re a visitor to the blog and have no idea what I’m talking about or a member of the school who has already experienced the awesomeness--I still want to tell you how much I love what the curriculum folks did! If you’re stationed in the upper level, make sure to stop by the dramatic play area, and check out all the little details you can find! I’ve seen home-made felt pieces before, but the school’s set goes beyond and looks like a true labor of love by whomever created the set! Actually, let’s just say that the WHOLE set up and design looks like a labor of love! Thanks, Curriculum Team!

 
Blog05_1_Pizzeria.jpg
 

OK, back to on point, eh?! Yes, yes, we always hear we shouldn’t play with our food, but when you’re an infant/toddler/preschooler (and maaaaaaybe adult, yup), playing with your food is also a potential learning opportunity that’s also mega fun! How? Well, let’s start off with the basics and two simple words: sensory experiences. OK, well maybe not ‘simple’ words since that sounds fancy when all it really boils down to is letting your kiddos discover something new in a preferably (to them) messy way (make sure you know where your vacuum is at all times)! By the way, I’m totally cheating by saying ‘Playing with Your Food’ since I’m really talking about food ingredients, but ‘Playing with Basic Dry Goods and Edible Components You Can Find in Your Kitchen’ just doesn’t have the same ring to it. Anyway, let’s start small and go with simple items for sensory fun before moving up to the big leagues with recipes!

1. Basic Sensory Table Fun!

Ah, let’s start down in Basic-Land. With a simple sensory table, you can let your little ones explore the different textures of basic food ingredients. The nice thing about playing with food stuff is that you don’t have to panic if your little one succeeds in slipping in a taste when you least expect it. Another plus is that you can buy ingredients in bulk, organic, non-GMO, cheap store brand, or any other available combination you want or just raid your own pantry when your kiddos come wandering around while you’re trying to cook a meal. You don’t need a fancy sensory table; you can use large bowls, repurpose a baby tub, dump out a storage bin, or get creative with whatever you can find lying around the house. Some fun ingredients you can experiment are oatmeal, cornmeal, lentils, flaxseed, rice, and popcorn kernels! They’re fairly easy to clean since they’re large enough a broom can sweep away, and a vacuum will happily pick up loose strays for the smaller items.

While exploring different textures works great while our little ones are still...well...little, once they’re bigger/older and out of choking hazard range, you can add treasures for them to discover. Let them explore with measuring spoons and cups making their own recipes while you follow your own and get dinner done! Check out some of the photos below of the sensory table at the school in action!

 
Blog05_2_sensory.jpg
 

2. Chili Beans

This one has to be in a section of its own since I love how uncooked chili beans are a perfect play item in disguise, and you literally don’t have to do anything except open the bag. Inside, you’ll find beans of different colors and sizes; get those little ones to practice their sorting skills! These beans are a great size to practice fine-motor skills, too, as well as being the perfect size for putting in order and counting to practice some math skills! Also, these guys can be used to make shakers for dancing (what little ones doesn’t like to do that?!)!

 
Blog05_3_beans.JPG
 

3. Cloud Dough

Alright, here we go: time for our first official recipe! To make this soft concoction, mix 1 cup of vegetable oil and 8 cups of flour. That’s. It. The hardest part is finding 8 cups of flour, but isn’t that what Costco is for? This stuff is fun, because it can hold shapes if you use a mold and easily crumble with just a tap. Best comparison I can think of is Kinetic Sand, except this one is all natural, way softer, and makes your dry winter hands feel like they just went to a spa! Check out the photo below for some Cloud Dough in action with the disclaimer that this can get messy! Make sure you have some floor protection if you have kiddos who love mess, or do it outside since the oil can make non-carpeted floors slick (and you don’t even want to try to get this out of carpet).

 
Blog05_4_Cloud.JPG
 

4. Oobleck

Now for one of my favorite recipes: Oobleck (isn’t that a fun name?! Thanks, Dr. Seuss--for the name and not the recipe that is!). This one’s also a real challenge of a recipe. Here we go: mix 2 parts cornstarch to 1 part water. Yep. That’s all you need to do in quite possibly one of the COOLEST recipes ever! Once you get past how cool Oobleck is to touch and play with, you can get to the science-y part. You can tell your friends you made a Non-Newtonian liquid, which means whatever you do, don’t pour this down the sink, because it’s not a normal liquid (friends don’t let friends dump Oobleck down the drain!). If you do, you will be telling a plumber how your fancy Non-Newtonian liquid made your clogged sink very Non-Worky. Don’t panic about washing your hands or letting a little bit wash down--just don’t put a lot at one time!

Ha, now with that warning out of the way: this stuff is so cool so MAKE THIS, and let your littles have fun with it! Since it’s just cornstarch and water, for clean up, you can wait for it to dry a bit and scrape it off into the trash or vacuum up when completely dry. You can even make it in a ziploc and have your little one play with it there if you just want to try a small bit to check it out. It really is a crazy liquid since if you apply force (like squeezing into a ball or even poking it) it will harden until you stop and then move like regular liquid again. Seriously, try it! I wish pictures could show how cool it is to play with, but you really need to experience it! Below you can see how you can make an Oobleck ball if you keep pressing it and applying force, but once you stop, it melts back down! You can also play with it by adding more water or cornstarch and seeing what different behaviors you get (warning: nerd blogger alert)!

Blog05_5_Oobleck.jpg

5. Homemade Playdoh

Last, but certainly not least...homemade playdough! For this recipe, I’m going to send you off to another place to get it, but don’t worry, it’s not far; you’ll still be on the school site. Also, here’s a pic of playdough at school! I love glitter in the playdough (ESPECIALLY when it’s not in my home, woohoo!)!

 
Blog05_5_playdough.JPG
 

I bet it’s safe to say I don’t have to explain the playdoh fun factor; it’s fun for any age! Knowing exactly what goes into what your kiddo plays with is a huge relief so enjoy the recipe! As an added plus, it’s a VERY forgiving recipe so let your kiddo help you with the measuring and pouring into the pot. Worse case, if your playdough comes out too sticky, you can have your little ones sprinkle flour and knead until you get the perfect playdough! If too dry, use a dropper and add water drop by drop until it’s juuuuust right! Or if the ACTUAL worst case happens and your playdough is unsavable, then you get the excuse to make the recipe again with your kiddo. Sure, getting playdough is the end goal, but the journey is just as important!

Finally, go ahead and store your playdough in the kitchen with the rest of the playdough toys--and by that, I mean your cooking tools! Cookie cutters are great for cutting out playdough shapes, and that rolling pin you barely use makes a perfect rolling tool for playdough, too! That garlic press is actually a playdough spaghetti maker, and that cheese spreader is a playdough knife! Give your kids some cooking tools, and you’ll be surprised with what they come up with.

 
Blog05_6_tools.JPG
 

So there you have it! I hope you have fun playing with your food aka PwBDGaECYCFiYK (see, it just doesn’t floooow right). If you have other ideas or recipes for sensory play, give a shout out in the comments or email me at blog@bothellfamilycoop.org

Squeak In the News 11/12

Holiday Travel

by Julia H.

As if by magic, we have been transported through time to the universe where it is only 11 days until Thanksgiving, with the winter holidays following immediately on Thanksgiving's heels. There are so many things to look forward to at this time of year! But, in many cases, there's a catch - travel, and sometimes lots of it.

Traveling with small children - no matter your mode of transportation - can create some difficult challenges, and it's easy to get stressed out while trying to help your kids navigate (sorry, I couldn't resist!) the process. Here are a few tips that might help you (and your family members) stay calm:

  • Explain what your kids can expect from the travel experience. Flying? Don't forget to talk about the security check process, how boarding works, and how during turbulence they might not be allowed to get up and go to the bathroom. Driving? Talk about how often you'll stop for breaks, how long it will take, whether you'll stay the night at a hotel, etc.
  • Lower your expectations: even grownups get cranky when they are stuck buckled into a plane or a car - and there's a good chance that during the course of your trip, your kids will get frustrated (and will express that frustration in normal, age-appropriate ways). It's easy to get angry when someone across the aisle is grumbling about your kid crying on the airplane, or when you miss a turn because the GPS' voice is drowned out by the 1000th request for a snack, but try not to lose your temper - it won't get you there any faster. If you do lose your temper? That's okay, it happens - it's a great opportunity to model mindfulness to your kids! Say, "Hey, I'm sorry. I lost my temper - I'm frustrated and nervous about all this traveling, too. How can we all work together to make this easier?"
  • Snacks and toys: Hungry means cranky, and cranky makes everything more complicated, so make sure you have travel-friendly snacks that you can access easily while traveling. Choose toys that can be used in lots of ways, and that don't have small parts that are easily lost.
  • Plan for the things you know will be hard for your particular child: for example, my youngest is a high-energy, wiggly kid, and she absolutely hates being stuck in a carseat for any length of time. In order to make longer trips possible, we include stops at local parks every 60-90 minutes or so on our trips. It takes longer to get places, but everyone's in a much better mood when we arrive!


The internet is rife with blog posts about traveling with small children, but I'm curious about what works for you! Send your tips to weeklysqueak@bothellfamilycoop.org and you may be featured in an upcoming Squeak!

Hey, do you miss seeing a photo from school in the Weekly Squeak? I do, too! If you have one to share, please send it to communications@bothellfamilycoop.org

Squeak In the News November 5

by Julia H. 

Oh my gosh, you guys, can we talk about Daylight Savings? First of all, if this is the first time you've thought about Daylight Savings this fall, I regretfully must inform you that the reason why the time on your phone no longer matches the time on your stove is because the whole setting the time back by one hour thing happened last night. I know. I'm sorry. I'm sad, too.

For those of you whose children are naturally late to awaken in the morning and late to sleep at night, this might be great news for you! Fewer car breakfasts and near-misses on morning appointments! If you're like me, with children who are naturally early risers, I apologize, but look for me on Facebook at 4AM, because I'll be awake and trying to explain why there are still so many hours until school.

Daylight savings can be hard with young kids. If you have the flexibility to slowly shift them to the new schedule over the course of a few days, absolutely do so (that also means you get to make the shift more gradually!). That said, remember that the time change can be hard for adults to adjust to even with all the auspices of a fully-myelinated frontal lobe, so just imagine how hard it might be for children to understand and adjust to such an arbitrary change in schedule? Keep in mind that, especially for the early risers, this might be a week with kids who are more short-tempered than usual, and try to plan in advance for events like this week's Family Soup Nights, which add a secondary element to an already slightly-off-kilter schedule!

Daylight Savings works best when you can plan in advance, so my apologies for the late notice...but check out this article from parents.com so you'll be prepared when we set the clocks forward in the Spring!

Got tips of your own? Send them to weeklysqueak@bothellfamilycoop.org and you may be featured in an upcoming Squeak!

Feeling Thankful for November!

by Florence B

How is it November already?! I hope you all had a fantastic Halloween and didn’t stay up too late running on sugar! I loved seeing our Bothell Family Cooperative Preschool friends dressed up in costumes during our class party (ours was last Friday and the start of our Halloween fun), and I’m sure you all did with your class parties, too! The curriculum team did a spooky, fun, and AMAZING job with the Fall, pumpkin, and Halloween themes; I hope no one missed the giant spider web on the ceiling downstairs!

 
Parade01.jpg
 

Alas, wave goodbye to October and bring on November, the month that reminds on to give thanks with families and strangers as well as new friends and old. Curriculum-wise, this month we’ll see themes of food, traditions, thankfulness, and turkeys (because we can’t have November without these fowl friends!). Downstairs in dramatic play, get your pizza serving skills ready, because you’ll find a pretend pizza restaurant for our little chefs. Search around and you’ll find books by Salina Yoon, November’s author of the month!

Look forward to family and soup nights at the school! Each class will get together on a different night; the infant and toddler class will celebrate family night while the older three classes will celebrate soup night! For soup night, we’ll each bring 1-2 cups of cut-up veggies for a delicious soup to be cooked during class and then served later on in the evening. As a bonus, we’ll get to meet all the mysterious siblings that we hear about during class!

On the 16th, get ready for our November parent meeting! We get a treat with Ann Hollar, a wonderful speaker from the Center for Child and Family Well Being, UW. Her topic of discussion will be: “Learn about how cultivating a culture of mindfulness in the school and at home can help shift the parent-child dynamic to one of gratitude and self-compassion.” Here's a link to learn more about Ann Hollar. One of her answers from her FAQ caught my eye; when talking about what she has learned from her own mindful practice she says, “I have learned to listen more fully, react less often; be more curious and less judgmental.” I’m excited to see what she has to say!

Speaking of what people have to say, look forward to some class sharing. The 2/3, 3/4, and Pre-K classes will have the opportunity to decorate a turkey picture for the Turkey bulletin board at school. In the older two classes, keep an eye out for anything turkey that you want to share!

And continuing with our 3/4 and Pre-K friends, they get to go on another excursion this month! We all enjoyed visiting the pumpkin patch last month, but this time the 3/4s and Pre-Ks are going to see where many pumpkins and other veggies go. They’re heading off to the grocery store, but not in a shopping cart playing Grocery Search with a shopping list! These lucky kiddos will get to go behind the scenes to learn how a grocery store works!

We have so much to look forward to in November in class, but don’t forget to make note of the holidays so you don’t find yourself missing class or looking at a locked building. Class will be closed on Nov 10 (Fri, Veterans Day) and Nov 22, 23, and 24 (Wed-Fri, Thanksgiving Break). There will class the Monday and Tuesday of Thanksgiving week.

Here’s to a fun month ahead! Give a shout out in the comments or email me at blog@bothellfamilycoop.org if you have anything November-related you’d like to share! Any topics you want to explore? Just let me know!

Squeak In the News 10/29

By Julia H.

October (and Halloween) is a great time to embrace the power of Magical Thinking! Magical thinking is how small children understand and process their world, and it differs in predictable ways depending upon the age of the child.

  • Infants and young toddlers fill in details about how things work, and how things relate to each other, using magical thinking. Although their conclusions may seem illogical at times, try to put your frustrations aside - as they gain more experience with the world, they will be able to work through and figure out their role in the world.

  • The three to four year old set often overestimate the power of their own magical thinking, which goes right along with this period of rapid mastery of everyday skills and growing independence.

  • As Kindergartners start learning the boundaries between fantasy and reality, you may see a more intentional shift in their magical play. 5- and 6-year olds often use fantasy play to help them cope with real fears or stresses in their lives - for example, re-enacting a fire safety drill over and over with their toys until they feel confident in their ability to follow the plan in an emergency.

Want to learn more about kids and magical thinking? Check out this article from Scholastic!

Got tips of your own? Send them to weeklysqueak@bothellfamilycoop.org and you may be featured in an upcoming Squeak!

Squeak In the News 10/22

Making Things "Just Right" at Halloween

By Julia H.

Recently, my dad sent me an old book of my mom's, copyright 1975, titled "Easy Costumes You Don't Have to Sew." Most of the costumes are made with some combination of old sheets, paper grocery bags, and cereal boxes, and range in complexity from a simple red sheet gathered at the neck to make a rough tomato costume to a "monster lobster" costume complete with hand-held cereal box lobster claws. I don't think any of the costumes uses more than a dollar or two worth of materials. All of them could easily accommodate children working to make the costumes with adults as "helpers." Probably none of them would be deemed "Pinterest-worthy,"...but, really, does that matter? As we approach Halloween, (as with many other prominent holidays that involve decorating, hosting parties, etc.), it's easy to get caught up in the unspoken competitiveness of the celebration. And for some people, elaborately decorating their homes, making gorgeous, detailed costumes, or cooking up beautiful, healthy, and thematically appropriate treats is something they really enjoy - and that's okay! For some people, it's just not how they want to spend their time...and that's equally okay! The flip side to developing family traditions around a holiday is making sure that your family actually enjoys those traditions, even if that means doing things differently from what is "expected" around that holiday. It also means finding ways to include everyone (even the little kids!), and recognizing when things are good enough - even if they are not perfect - so that everyone is still enjoying themselves. In our house, that looks like minimal decoration of the house, but lots of working together on homemade costumes. Halloween snacks are (sorry for the pun) not even on the menu. What does your family's "just right" Halloween look like?

Got tips of your own? Send them to weeklysqueak@bothellfamilycoop.org and you may be featured in an upcoming Squeak!

Outside Fun at School and Fenced Playgrounds!

By Florence B

Our gorgeous Seattle Summer weather was perfect for soaking up sunshine while enjoying outside play, and I’m sure we all took advantage of what Mother Nature gave us! But alas, summer has to move aside for the other season (yes, singular): Rainy Season! Luckily for us, add a rain jacket, a pair of rainboots, and maybe an umbrella if we’re feeling extra careful, and we get to enjoy the gorgeous green background that is why we’re called the Evergreen State! Jumping in puddles, laughing as raindrops dance on umbrellas and jacket hoods, collecting leaves of different colors, digging and exploring in muddy areas… let’s face it, rain is fun for us--I mean the kids!

 
Blog03_01_CoveredArea.jpeg
 

What I love about Bothell Family Cooperative Preschool is that almost every class has about 30 minutes of outside time for the kids to experience the outdoors during any of nature’s moods. While it may be easy for us as adults to ignore nature’s plea for us to go play as rain falls, kids are more than eager to answer that friendly request, and I love that the school makes sure we don’t forget this important aspect of childhood learning. The only class that doesn’t have outdoor time as a major part of the daily schedule is our youngest friends in the Parent & Baby class. Don’t worry about these little ones missing out; the class eventually works up to increasing outside time as those little crawlers and huggers become walkers and runners!

 
Blog03_02_ComeExplore.jpg
 

If you’re a visitor stopping by the blog and haven’t visited our backyard of fun, it’s quite the treat! I remember first looking and seeing a little playground next to a large outdoor shed just past a little garden area. And then, walking further out, I was amazed that the backyard. Just. Kept. Going! Around the corner to the left there was a dirt pile and a large wooded area with two climbing domes tucked in among the trees. To the right there was a large arched trellis with vines that I later learned were grapevines where the kiddos could directly pick fresh green grapes. In front of where I stood, a wooden play structure greeted me with visions of my daughter having countless hours of fun as she climbed, waved from the top, and slid down slides. And I had thought the inside of the school was cool.

For those of us in the younger classes, we don’t get to enjoy the company of our Outdoor Education Specialist, Angela La Tourrette, like the 3/4s and Pre-K classes. She’s responsible for implementing the outdoor curriculum while also offering guidance for us caregivers. Luckily, even though the younger classes don’t see her during class time, we feel her outdoor touch as she helps maintain organization of the outdoor equipment and supplies!

 
Blog03_03_BFCPandOutdoorFun.jpg
 

School helps us remember how outdoor play can be fun and fantastic in rain or shine, and once we leave the school, the outdoor fun doesn’t have to stop! Sidewalk chalk is great for showing off artistic skills with the added plus that cleanup is easy with the next rainy day. If you don’t have a green thumb, you and your little ones can pick weeds in the yard with the added bonus of knocking some maintenance work off your to-do list. Trim some bushes or trees, and use the clippings for playing in the dirt or indoor art when you’re ready to hunker down inside. Take a walk in the rain with an umbrella for both you and your kiddo, and see how many sidewalk puddles you can find (just don’t forget your rain boots before you jump in one!).

If you’re looking for play structures and new friends to find, then you’re in luck! There are so MANY local parks in our area that range from small neighborhood ones to large state ones! Since it would take several blog posts to cover even a fraction of all the amazing parks that the Greater Seattle Area has to offer, I want to start small and share five fenced parks that are nearby.

First off, let’s go through a list of why fenced parks are awesome in different scenarios:

  1.  You have a runner. These kiddos are the ones that love to run in the direction away from you while you’re marveling that they somehow inherited an Olympic sprinter gene--the one you don’t have. Hearing their name called is translated to run faster. Don’t worry, once they reach that fence, you will finally catch up to them.
  2. You have an infant or toddler. Fenced playgrounds are generally geared to the younger crowd with equipment that they can access easier. Most importantly, you’re probably not going to see bigger kids hanging out in the ‘baby area’ if you’re worried about your little one getting trampled, and if you do spot some, they’re probably an older sibling and well-versed in the mantra “GENTLE, GENTLE!!!!”
  3. You are pregnant and have a preschooler. You don’t even have to get up to corral your active one, because the fence is already doing it for you (insert high-fives here).
  4. You have an infant and a preschooler. See number 3 reasoning, because your older one’s activity level is directly proportional to when your younger one needs to be fed, nap, or have a diaper change. I’m fairly certain the second law of Sibling dynamics covers this.
  5. You’re having a playdate. See number 3 reasoning. You can actually talk to another adult at a park, and if you’re feeling confident, even sit on a bench to do so!
  6. You have a young child, and you’re conserving energy. See number 3 reasoning, which probably should have been number 1, capitalized, and the only thing on this list.
  7. It’s lunch and you have a child who won’t sit and eat. Eventually your little one will cross paths with you (and that sandwich) without you getting up from the picnic blanket. Actually, let’s just say see number 3 reasoning.

With no further ado, here’s a list of five fenced parks in no particular rational order except for when I learned about them. Parks 1, 2, 3 and 5 photo credits to the park websites!

Blog03_04_TotLotPark.jpg

1. Tot Lot Park at 111 9th Avenue, Kirkland. This park is fully fenced with gate. Tot Lot Park is a fantastic starter park if you have a little one ready to explore. The play structures are easy to climb with small slides, having been designed with toddlers in mind. There’s a large cement turtle ready for chalk art that gives the park its friendly nickname “Turtle Park.” You’ll also find a large sand pit for digging and swings for added fun. Picnic tables are available, but you can also bring a picnic blanket to settle in on the grass for some peace and comfort (because did I mention a fence)?

Blog03_05_PhyllisNeedy.jpg

2. Phyllis A. Needy Houghton Neighborhood Park at 10811 NE 47th Street, Kirkland. This park is fully fenced with gate. Phyllis A. Needy Park is also a great park for those with little ones who love to dig! There’s a sandpit, swings, spring riders, and a climbing structure (for younger ones with a little more mobility skill than at Tot Lot Park). There are also picnic tables available, but that picnic blanket you used at Tot Lot can also be used on the wide-open grass since that wide-open grass is also fenced.

Blog03_06_TamberkCreek.jpeg

3. Tambark Creek Park at 17217 35th Ave. SE, Bothell. This park is fully fenced with gate. Tambark Creek Park has a wonderful playground designed for the five and under crowd. They have some more advanced play equipment along with some easier ones for those still working on mobility. If you have more of an age spread with multiple kids, this playground will be sure to entice both ends of the up to age five spectrum with some activity. While there are only benches for you to sit on within the playground, venture out from the fenced haven, and you’ll find picnic areas, trails, woodlands, wetlands, and an overall good time!

Blog03_07_StEdwards.jpg

4. St Edwards Park at 14445 Juanita Dr. N.E., Kenmore. Under Five play area is fenced with open doorway in. St. Edwards State Park has an amazing playground area that needs to be experienced and not described, because it’s. That. Much. Fun! Once you’ve gotten your initial look at the large wooden play area that’s like a cross between the tree house you’ve always wanted and the castle you want to rule, enter and find the entrance to the five and under area. While not gated, this fun and age-appropriate area is fenced and you only have about five feet of non-fence to worry about your little one to sneak through. Luckily, there’s a bench nearby ready for a sentinel on duty! This infant, toddler, and preschooler zone also has a sand pit and swings in addition to smaller play structures. When you’ve gathered up strength and filled up on fortitude, you can explore the gorgeous scenery this state park has to offer. There are plenty of trails to explore and discover new treasures. Speaking of discover, you do need a Discover Pass to park. Don’t let that stop you; it’s well worth the fee!

Blog03_08_NRoseHill.jpg

5. North Rose Hill Woodlands Park at 9930 124th Avenue NE, Kirkland. Two fenced play areas with open doorways in. Finally, last but certainly not least is gorgeous North Rose Hill Park which ups the ante by having TWO fenced play areas--THREE if you do creative counting. Like the non-gated play area in St. Edwards Park, the play areas here aren’t gated, but you have mostly fenced areas giving you peace of mind. One fenced play area is at the North East end of the park and looks like your standard fun playground mostly designed for the younger crowd with a center play structure needing more of an older toddler or preschooler skill level to climb and enjoy. However, on the west side of the park is the true star and gives this park its nickname “Castle Park.” Bring your Lords, Ladies, Knights, Jesters, Kings, and Queens, because they are going to have a blast bringing imagination to life in this wooden castle! While the main structure is designed for the older set on the children age scale, this glorious playground is FENCED (well, aside from that entrance, but someone must have forgotten to raise the drawbridge)! And then, as you enter this royal abode, take a journey to your left to find the play area for the younger crowd. Which. Is. Also. Fenced. Yes, that does mean you have a fenced play area in a fenced play area (Fenception for you Inception fans).

Well, there you have it! From a simple hop to your backyard to a lengthy jaunt at a state park, I hope you enjoy our beloved rainy season by getting outdoors and having fun! While we’re all relieved to know our kiddos are set at Bothell Family Coop Preschool when it comes to outside play, hopefully this post helped you find some inspiration for the rest of the days of the week!

Shout out in the comments or email me at blog@bothellfamilycoop.org if you have some more ideas for rainy day outdoor fun, a park you love, or any other idea you’d love explored in a future blog post! Thanks for stopping by!

 
Blog03_09_letsPlay.jpg
 

Squeak In the News 10/8

The Teal Pumpkin Project

By Julia H.

For most families, Halloween is all about costumes, candy, and community fun. For some families, however, Halloween comes with a big challenge - how to avoid exposing loved ones to potentially deadly food allergens while still allowing them to participate in the holiday fun. The good news is that it's easy to make trick-ore-treating more inclusive by simply making the choice to offer a non-food treat option to people who visit your home on Halloween!

Here are some tips from the Teal Pumpkin Project, which advocates for allergy-related Halloween safety:

  • Offer candy and treats in separate bowls so as not to cross-contaminate the non-food treats.

  • Try to choose toys that don't include common allergens, like molding dough (which sometimes includes wheat) or balloons (which usually include latex).

  • Make sure trick-or-treaters know that you have a toy option.
  • Tell others you're planning to include a non-candy option; the more people who offer alternatives, the more inclusive Halloween can be!

Got tips of your own? Send them to weeklysqueak@bothellfamilycoop.org and you may be featured in an upcoming Squeak!

Pumpkins, Pumpkins, and More Pumpkins: Tips for the Pumpkin Patch and for Decorating the Pumpkin you Take Home

By Florence B.

It’s October, and we’ve got a great curriculum set up to celebrate the month that’s all about Autumn fun! We’ll be covering Fall (because who can’t help but fall for Fall with all the fun it brings?!), pumpkins, corn, and feelings and emotions. You’ll see our Autumn Home Center set up in the dramatic play area with costumes making an appearance the last week in October (because we can’t have October without some Halloween and make-believe fun!)!

Blog2_01_PumpkinsAtSchool.JPG

Let’s rewind a bit and focus on that second bit of awesomeness I mentioned in the curriculum--pumpkins! Our first excursion is coming up in mid-October! Wait a sec--what’s an excursion? Well it’s one of the fun things that BFCP provides so that members and their children can explore the many fantastic places that the greater Seattle area has to offer! These mini-adventures allow us to learn about our community while strengthening our own community at school, because who doesn’t like to go and learn about new things and visit places with friends?

For those of you not familiar with the classes BFCP has to offer, the parent & baby and toddler classes both go on two excursions each year, the 2/3 class goes on three, the 3/4 class goes on six, and the ever adventurous Pre-K class goes on six to eight a year! For those of you alumni, I’m sure this is one of your favorite things to do in the program; and for those of us new folk, I’m sure it’ll end up being one of our favorites, too!

Well, pumpkins...excursions; I guess it can’t be too hard to guess where the first excursion will take us! We’re heading to a pumpkin farm! Check your class calendar for the date and time for when your specific class is going; each class will be going during their respective class time! For those in the parent & baby class, after we enjoy a picnic lunch at Meadowdale Park, we’ll head to the Fairbanks Animal Farm and Pumpkin Patch! We’ll be able to check out the farm animals as well as take the Hidden Bear Trail to visit Pumpkin Land to find our perfect Fall favorite pumpkin (or gourd if that’s your fancy--they’ll have plenty of those, too)! For the rest of the classes, we’ll head out to the The Farm at Swan’s Trail. We’ll explore some of their 50-acre pumpkin patch, go on wagon hay rides, and check out their Fall Festival Fun event, which includes a fantastic play area as well as farm animals!

Blog2_02_PumpkinPatch.jpg

Here are some handy tips for visiting any kind of pumpkin farm:

1) Have your camera ready at all times, because there’s a good chance your kids will have a blast! You may find your kids pointing at little pumpkins, big pumpkins, different colored pumpkins, and pumpkins that you cannot discern why your kid is pointing at them. BUT, they will have a huge smile on their face so you won’t want to miss that!

Blog2_03_Pointing.JPG

2) Get dressed for mess! Let’s face it; pumpkins don’t grow in nice bins like the grocery store will have us believe. If it’s raining or has rained during any of the days before, there will likely be mud, and no matter your best efforts, that mud will get on you. If you have rain boots, wear them! Depending on the type of pumpkin patch, rain boots may or may not work for your little one. Some places have lots of thick vines on the ground that might be hard to maneuver in the larger rainboot footwear. Be prepared for little feet slipping out of boots, so pack extra socks or even an extra pair of sneakers!

3) Bring large trash bags and a large cardboard box (or something that can stop that round, muddy vegetable from making your trunk look like a mud fight happened and your trunk lost) if you plan on bringing a pumpkin home (and really, who wouldn’t want to take a pumpkin home?). Oh… this we learned the hard way. Once you picked out that once-in-a-lifetime specimen of all-that-is-great-in-the-world-of-pumpkins (at least according to your child), you will have to figure out a way to get said pumpkin home, regardless of how muddy it is and the fact that you just cleaned out your trunk. With. A. Vacuum.

4) If you are terrible at judging size, bring a string to help you take measurements out in the field. Many pumpkin farms have you ‘size’ your pumpkin yourself, meaning they have example pumpkins ordered by size and price so that you can compare the one(s) you find against theirs and figure out how much you owe. If you don’t want a surprise when you go to check out, take a measurement of the pumpkin in your budget beforehand!

5) Bring a bag! If you’re planning on getting many little pumpkins, consider bringing a very sturdy bag, kind of like those heavier duty reusable shopping bags. While most pumpkin patches have wheelbarrows or wagons to help you lug around your pumpkins, they’re usually limited and are best used when going from the pumpkin patch to your car (trying to maneuver a wheelbarrow in a pumpkin patch is not the easiest thing to do). With the bag, you can place it down when needed (even as a ‘this-is-taken’ sign when placed next to bigger pumpkins you may set aside) and follow your kiddo as they find another amazingly awesome gourd that you must take home!

Blog2_04_wagon.JPG

Alright! So you’ve made it home and you have your pumpkin(s)! Now what? Well, now you can have even more fun! The fun doesn’t end when you leave the excursion! Don’t forget to share what you and your kiddos ended up doing by posting pics in your class Facebook pages! AND if you’re feeling extra proud of your creation, share with the main BFCP Facebook page!

If your infant, toddler, or preschooler doesn’t quite have the dexterity or skill to carve a pumpkin yet, (yes, let’s says it’s because the kids can’t carve, not us) don’t worry; I’ve got some ideas for decorating those pumpkins right here for you!

1) Wait a sec--why do anything at all?! You have an awesome pumpkin (or pumpkins!) that you just spent time picking out with your kiddo. Let that veggie shine in all its natural glory as fall decoration at its best! By the way, pumpkins can last quite a while as long as the skin is solid but degrade rapidly once you carve or break the skin, so keep that in mind if you want your pumpkin greeting your Halloween visitors!

2) Stickers! Who doesn’t love stickers? ‘Tis the season for Halloween stickers so pick some up and have your kiddo go wild! Smaller stickers work better depending on pumpkin curve, so keep that in mind! You can also find some “googly eye” stickers to bring your pumpkin to life! If you’re planning on showing your new work of adhesive art outside, plastic-based or foam stickers work great so they won’t get ruined by moisture like the paper ones!

Blog2_05_stickers.JPG

3) Markers! If you’re not quite at the point of handing your kiddo a Sharpie and hoping for the best, go with good old washable markers! When your kiddo is done making their masterpiece, you can trace over the art with permanent markers to make their design ‘pop’! OR...spray with a sealant and call it a day!

4) Paint! Grab a smock, put on some old clothes, and take the acrylic paints off the highest shelf you have, because painting a pumpkin is a great way to let your little budding artist shine! For a 3D effect, look no further than puffy paint for a one-step colored 3D effect or tacky glue as your 3D design primer before painting.

Blog2_06_painting.JPG

5) Paint...WITH glue and glitter! If you’re brave and entrusted with the mightiest of vacuums, grab some clear-dry glue, food dye (or watercolor), and bottles of glitter (also sequins, bits of tissue paper...you get the idea!). Water down the glue a bit (not too much!) to make it easier to paint (or use as is), and then sprinkle your glitter after painting. Add the dyes to the glue if you want more color! If you use washable glue or tissue paper, make sure to use a sealant before placing outside! Tip: if it looks like a fairy stopped by and left an explosion of pixie dust at your house, you can use contact paper, lint removers, or plain tape to pick up strays that your vacuum rejects!

6) Crayon drip! So you know all those broken crayons that can’t be used for coloring any more (at least according to your child) or that stash of freebie crayons you keep getting from restaurants in the same three colors? Never fear, those crayons are the stars of this idea! Arm yourself with some glue, a hair dryer, and aforementioned crayons, and you’ve got yourself the makings of a fun and unique way to decorate! Glue (tacky glue is great) your peeled crayon bits at the top of the pumpkin, let the hair dryer melt them, and then have gravity do the rest! You can keep adding more layers, so keep going!

7) Carve! Yes, I have to include this Halloween staple even though this is a “list of ideas if you don’t want to carve your pumpkin” (details, meh)! As you lament your artistic ability, remember it’s all about the journey for you and your kiddo, not the destination. No matter the age, taking out the pumpkin innards is a messy blast! Younger kids can enjoy the sensory adventure as they investigate the pumpkin seeds and pulp. Try to pick out the seeds and put them in a cup, use a spoon to mix, smear the pulp around--there’s so for these investigators to do! Once you pick out a design for your pumpkin, your kiddo can help transfer it over. You can use contact paper to draw directly on the pumpkin and have your kiddo poke or trace the lines of your design onto the pumpkin. They just need to bruise the skin a little for you to see the design when you take the contact paper off. Any pieces you remove from the pumpkin as you carve goes straight to your kids to explore. Cut a hole through and remove a big chunk; investigate the difference between the tough pumpkin skin, the soft inner flesh, and the slimy pulp. Chip away at the skin for your design and show the color differences between skin and pumpkin flesh. When you’re done and drop a light inside, show the differences with the carved sections versus the skin. What about the areas that were carved deeper? What about the hole you cut through?

Blog2_07_carving.JPG

Well, there you have it for this week’s post about pumpkins! Sound off in the comments if you have any tips or ideas about pumpkins to share! If you have feedback or ideas you’d like to see featured in future blog articles, send me an email at blog@bothellfamilycoop.org.